
In the world of commercial photography, there are few niches where lighting can make or break your shot like it does in food photography. Mastering food photography lighting techniques is not just a skill, but a crucial necessity that can drastically upgrade your portfolio.
This article is intended to help you sharpen these specific skills, presenting you with proven techniques that will take you from shooting in the dark to creating captivating, visually-pleasing photos that resonate with your audience.
If you’re keen to transform your ordinary food shots into extraordinary works of art, then this informative guide will be your roadmap to success in the spectacular realm of food photography.
Here’s what we will be covering in this article
1. Understanding the Importance of Light in Food Photography
2. Exploring Different Types of Lighting Techniques for Food Photography
3. Mastering the Timeless Art of Natural Light in Food Photography
4. Gaining Edge with Artificial Lighting: Soft Boxes, Speedlights and More
5. Expert Tips and Tricks for Captivating Food Photography Lighting: From Shooting Angles to Post-Production Edits
Understanding the Importance of Light in Food Photography
To comprehend the significance of light in food photography, one must first appreciate the role light plays in photography in general. Quite simply, without light, photography wouldn’t exist. It’s the essence of every shot, the “paint” that a photographer uses to create their images. In the context of food photography, light is even more critical as it directly impacts how a dish appears and, consequently, how appetizing it appears to the viewer.
1. Creating depth and dimension:
In food photography, light is utilized to highlight textures and create shadows. This brings depth and dimension to your shots, making the food appear more appealing and realistic. Manipulating light source direction, intensity, and color temperature allows photograhers to create a myriad of effects that evoke different moods and narratives.
2. Accentuating texture and color:
Only with the appropriate usage of light can the glossy sheen of a sauce, the crispy crust of bread, or the vibrant colors of fresh fruits and vegetables be truly appreciated. It’s all about showcasing the textures and hues that make the food look enticing.
3. Setting the mood:
The way a dish is lit can set the entire mood for the image. Bright light with shadows can depict a fresh and crisp scene, perfect for a springtime salad. On the other hand, moody and dramatic lighting can emphasize the coziness of a hearty stew. As a food photographer, understanding how to manipulate light to evoke specific emotions is a powerful tool.
Exploring Different Types of Lighting Techniques for Food Photography
With the importance of light in food photography established, it’s crucial to explore the different types of lighting techniques commonly used in this field.
1. Soft lighting:
This technique uses diffused light to create soft shadows and low contrast. A cloudy day or a window with sheer curtains provides perfect soft lighting. It’s ideal for capturing detailed or textured dishes.
2. Hard lighting:
This technique creates high contrast between light and dark areas, resulting in sharper shadows. It can be created using direct sunlight or a spotlight. This style of lighting can add drama and intensity to a food shot.
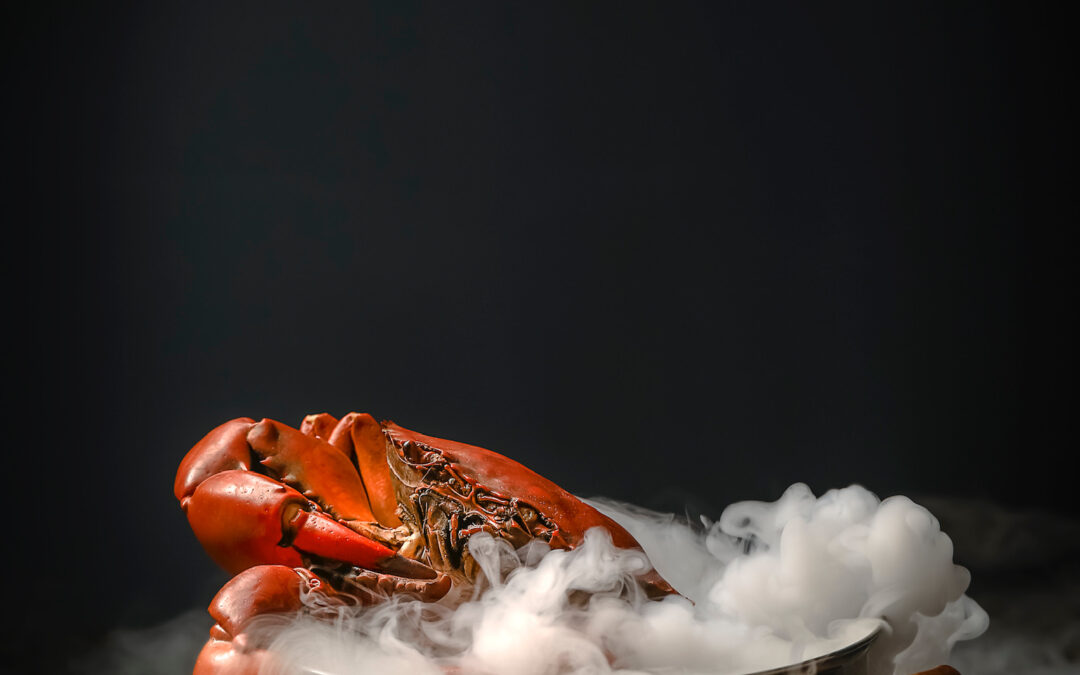
3. Backlighting:
This is when the main light source is behind the subject, illuminating the food from the back. It’s especially effective in highlighting details like steam or the transparency of food or drink.
4. Sidelighting:
This is when light comes from one side of the food, creating depth, contrast, and shadow. This is ideal for showcasing texture and detail in the food.
Through understanding and experimenting with these different lighting techniques, a food photographer can greatly enhance the appeal and visual storytelling of their food images.
Exploring Different Types of Lighting Techniques for Food Photography
Understanding the various ways you can light a food shot opens up a world of possibilities when it comes to creating that perfect photo. The following lighting techniques are among the most commonly used and effective methods in food photography.
1. Natural Light
- Direct Light: The direct light is nice and sunny. It can be a bit harsh at times, creating strong shadows and highlights. However, with proper positioning and use of reflectors to soften the shadows, you can achieve a stunning, dramatic food photo.
- Diffused Light: On a cloudy day, the clouds act as a massive diffuser of sunlight, resulting in soft, evenly distributed diffused light. It is excellent for capturing vibrant colours and intricate details without causing overexposure or deep, harsh shadows.
2. Artificial Light
- Continuous Light: A constant light source that stays on, offering a steady stream of light for as long as it’s switched on. It’s best suited for shooting food in still, indoor settings where you need a controllable, consistent light source.
- Flash/Strobe Light: This is an intense and very brief burst of light, like a camera’s flash. Strobes can provide a crisp, clean, and sophisticated look to the food.
3. Mixed Light
This technique involve mixing natural and artificial light to create a perfect blend and balance of lighting conditions. It’s tricky and needs careful consideration, but when done right, the result is visually intriguing.
Understanding how these different types of lighting techniques work and when to use them is crucial in creating stunning and scrumptious-looking food photography. It takes time, practice, and a lot of experimentation. But once you get it down, the possibilities are virtually endless.
4. Light Modifiers
Light modifiers are an essential tool in controlling the quality and direction of light. They can be anything from reflectors, diffusers, softboxes, umbrellas, grids, or snoots. These modifiers can soften, direct, spread, or concentrate the light, depending upon what effect you want to achieve.
5. Conclusion
But remember, there’s no one-size-fits-all solution in lighting food photography. Some lighting techniques or modifiers may work perfectly for a particular shot but not another. So keep exploring and experimenting with different light scenarios until you find what works best. After all, mastering food photography is about understanding light and using it to your advantage.
Mastering the Timeless Art of Natural Light in Food Photography
Natural light has a myriad of applications in food photography, and mastering its usage is tantamount to creating stunning and appetizing images. Understanding how to leverage the unique attributes of natural light can catapult your food photography to a totally new level.
1. Recognizing the Role of Natural Light
Natural light offers a unique form of illumination that can’t be duplicated by any artificial light source. It tends to be soft and diffused, with an unrivaled capacity to make food look fresh, inviting, and utterly irresistible. The push towards authenticity in images, particularly in the food industry, makes natural light a highly valued resource in the realm of food photography.
2. Identifying Natural Light Sources
Windows and open doors are prolific sources of natural light for food photographers. Choosing a north or south facing window can be advantageous due to the consistent flow of light, and placing the food close to the window can give you a beautiful light gradient across the dish. Open doors are best utilized during the golden hour – the hour after sunrise, and hour before sunset – when the sun is low and offers a distinctive, golden hue.
3. Using Reflectors and Diffusers
Reflectors and diffusers can be your best allies when shooting in natural light. Reflectors allow you to bounce light back onto the subject, filling in shadows and brightening the overall image. Diffusers, on the other hand, can soften harsh sunlight, preventing unwanted shadows and hotspots. Simple household items like white cardboard or aluminum foil can serve as makeshift reflectors, while curtains or translucent white fabrics can effectively act as diffusers.
4. Manipulating the Direction of Light
The direction of light significantly influences the mood and texture of your food photography. Backlighting, for instance, creates a dreamy, ethereal atmosphere that can make dishes appear fresh and appealing. Sidelighting can emphasize texture and create depth, while front lighting may flatten out your image but can work well for very textured foods.
5. Post-Processing: Correcting and Enhancing Natural Light
It’s important to remember that natural light is not always perfect, and post-processing is often necessary to rectify issues such as color casts or distracting shadows. Platforms like Lightroom or Photoshop can be used to correct exposure, adjust color temperature, and enhance areas that need a bit more light or color. Once you’ve solidified your editing process, you can take your food photographs from good to great.
Natural light is a powerful tool and understanding its characteristics can greatly improve your food photography. Remember, practice and experimentation are key. As you continue to shoot more dishes and experiment with different light scenarios, you’ll progressively refine your skills and develop a more acute sense of light perception. The journey to mastering the art of natural light in food photography is truly a rewarding one, filled with opportunities for growth and unique, captivating results.
Gaining Edge with Artificial Lighting: Soft Boxes, Speedlights and More
Professional food photographers in Singapore are always seeking ways to gain an edge in their field. One such way is through the use of artificial lighting techniques, such as using soft boxes, speedlights, and more. Increasingly, these tools are being utilized to not only enhance food photography shots but to create unique, visually-appealing images that captivate viewers.
1. Soft Boxes
Soft boxes are ideal for food photography due to their ability to provide a softer, diffused light that wraps around the subject, creating a smoother finish with less harsh shadows.
- When using a soft box, it’s crucial to play with the distance and angle to achieve the desired lighting effect. A larger distance results in a harder light while closer distance provides softer light.
- The angle of the soft box also matters. Adjust its position to highlight or diminish certain aspects of the food item being captured.
2. Speedlights
Speedlights are another excellent tool for artificial lighting in food photography. Their use involves using a flash to fill in any harsh shadows and add a sparkle to the food.
- Position the speedlight to one side of the camera and bounce the light off a reflector or the ceiling to get diffused, softer light
- When using a speedlight, sync it to the camera shutter speed to favor the ambient light and allow more control over the illumination.
3. Other Tools
In addition to soft boxes and speedlights, there are other tools for gaining edge with artificial lighting.
- LED Panels: These provide a steady light source and are fantastic for taking video footage or shots that require long exposures. Various LED panels also come with adjustable color temperatures to provide greater flexibility.
- Umbrellas: Similar to softboxes, they diffuse and spread light. However, light from an umbrella is typically broader and less directional compared to a soft box.
- Reflectors: These tools reflect light back onto the subject and can help manage shadows and contrast. Reflectors are particularly useful when shooting with one light source.
Understanding and mastering these artificial lighting tools can definitely put you ahead in the professional food photography industry in Singapore. Remember, experimentation is key; learn how to blend different artificial lights to produce the most tantalizing and tantalizing food shots.
Expert Tips and Tricks for Captivating Food Photography Lighting: From Shooting Angles to Post-Production Edits
Getting the lighting right is one of the core aspects of creating appetizing food photography. From the position of your lights to post-production edits, there are several factors that contribute to the final mood and tone of your shot. In this guide, we will delve into expert tips and tricks that can elevate your lighting skills to new heights.
1. Understanding Your Shooting Angles:
Understanding your shooting angles is crucial in food photography. While the angle can change depending on the dish being photographed, there are common angles that often yield the best results.
1. Top-Down Angle:
This is a popular angle for capturing flat-lay images. Lighting is crucial here because you do not want to create harsh shadows that might disrupt the aesthetic of the image. Use large, soft light sources to achieve an even light and detail capture.
2. 45-Degree Angle:
This is ideal for showing all elements of a dish, from the garnish on the top to the base of the plate. It’s crucial to balance shadows and highlights to add depth and interest to the dish.
3. Edge-on Angle:
This angle can be a little tricky but when done correctly, it can create enchantingly dramatic images. Ensuring your main light source is from the side can cast deep shadows creating a three-dimensional look and feel.
2. Creating a Mood with Lighting:
In food photography, your lighting can set a particular mood for the image. Here are some various ways of using light:
1. Soft Lighting:
Soft lighting creates a luxurious feel and captures the subtlety of textures. This can be achieved by diffusing your light.
2. Hard Lighting:
For a bold, crisp appearance, hard lighting can create definitive shadows and highlights. This requires a direct, undiffused light source.
3. Backlighting:
This is great for highlighting the texture and transparency of food items. It involves placing the light source behind the food item, which can make it glow and look more appetizing.
3. Post-Production Edits:
Post-production editing is a critical part of the process where you can fix minor issues and fine-tune your images. Below are some common post-production edits applicable to food photography:
1. Fixing Exposure Levels:
If you’ve over or under-exposed your image, this can be typically fixed by adjusting the exposure slider in your editing software.
2. Color Correction:
Accurate Colors are crucial for food photography. Ensure your white balance is correct during the shoot, but minor adjustments can be made in post-production.
3. Enhancing Details:
Increase the sharpness in your image and enhance the finer details of your shot. Just make sure not to overdo it, as this can make your image appear unnatural.
Remember, lighting in food photography is a complex domain that requires ongoing experiments and trials. These tips and tricks mentioned above can aid you in improving your own food photography, allowing you to create stunningly scrumptious images.