
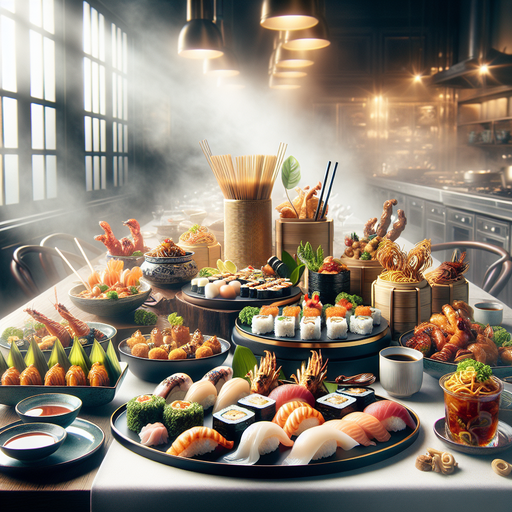
Have you ever marveled at the allure of a culinary masterpiece beautifully captured in a photograph and wondered how it’s done?
Unlocking the secrets behind the best food photography could be the key to unleashing your own creative potential. This compelling venture not only can ignite your creative spark but can also significantly enhance your professional portfolio. In this comprehensive guide, we will break down our top methodologies and techniques. Expect to explore every aspect of this fascinating discipline, from composing the quintessential shot to using lights and shadows to your advantage.
Whether you’re a budding photographer or a seasoned pro looking for fresh inspiration, this exploration of food photography will offer invaluable insights and knowledge, prompting you to view and capture food in a whole new light. So, are you ready to take a bite out of the best food photography practices? Keep reading to transform your everyday meal into a work of art!
Here’s what we will be covering in this article
1. Familiarizing Yourself with the Basics: Understanding Food Photography
2. The Art of Composing an Eye-Catching Shot: Food Styling and Arrangement
3. Mastering the Use of Lights and Shadows: Essential Lighting Techniques in Food Photography
4. Enhancing Food Photography with Professional Edit Techniques
5. From Hobby to Profession: Incorporating Food Photography into Your Portfolio.
Familiarizing Yourself with the Basics: Understanding Food Photography
Food photography is an art form that has seen significant recognition and growth, particularly in this era of social media and digital marketing. It requires a perfect blend of technical skills, artistic acumen, and an understanding of gastronomy to produce captivating images that can instantly stimulate the viewer’s appetite. Hence, one’s dive into the basics of food photography should commence with a profound understanding of these key components.
1. Understanding The Role of Food Photography
Food photography is more than just taking pictures of food. It is about capturing the essence and soul of the dish, its ingredients, and its association with a particular culture or tradition. The purpose of food photography is multi-dimensional. It can be used for promotional purposes, in cookbooks, on restaurant menus, in food blogs, magazines, advertisements, and even to capture the essence of a personal culinary experience.
2. Identifying Your Style
Every photographer has a unique style, and this also rings true for food photographers. Your style could range from dark and moody, which brings out the rich, deep colours of food, to light and airy that evokes a sense of freshness. Understanding and defining your personal style takes time, practice, and a lot of experimentation.
3. The Technical Essentials
a. Equipment
One doesn’t necessarily need high-end equipment to create effective food photographs. Even a basic digital camera or a smartphone equipped with a superior camera can produce great results. However, investing in a DSLR or mirrorless camera can offer more control over settings like aperture, shutter speed, and ISO.
b. Lenses
Different kinds of lenses can create different effects. A macro lens can reveal the intricate details of food, while a wide-angle lens is excellent for capturing group shots of food or an entire dining setup.
c. Tripod
A tripod is essential for capturing sharp images, especially in low light conditions or when employing slow shutter speeds. It also allows for consistency and stability when composing shots.
4. Composition and Presentation
The composition is the placement or arrangement of visual elements in a photograph. It is what makes an image not just seeable, but also eye-catching. Understanding and using the rule of thirds, finding the right angle (overhead, straight-on, or at a 45-degree angle are common in food photography), and effectively using negative space are basics of composition in food photography.
5. Culinary Knowledge
Understanding food is imperative for a food photographer. A basic knowledge of cooking techniques, knowledge about ingredients, and skills to style food can set a photographer apart. This can also aid in collaborating with chefs and food stylists.
In conclusion, understanding the basics of food photography is like gathering the ingredients for a recipe – it is the first and vital step towards creating a mouthwatering visual feast.
The Art of Composing an Eye-Catching Shot: Food Styling and Arrangement
When it comes to food photography, understanding the principles of arrangement and styling is crucial to creating photographs that make a statement. It’s not just about capturing the dish, but about telling a delicious story that teases the palate even before the food has been tasted. In this section, we delve into several key elements that will enhance your food photography composition skills.
1. Understanding the rule of thirds:
The rule of thirds is a basic principle in photography that advises the artist to imagine the image divided into nine equal parts with two equally spaced horizontal lines and two equally spaced vertical lines. The suggestion is to place the important compositional elements along these lines, or at their intersections for dynamic balance.
- The center of the dish can align with one of the intersections to create a focal point.
- Adding elements that follow the lines gives the image depth and direction.
2. Playing with angles:
The angle at which the food is shot can significantly change the feel of the picture. This is highly dependent on the food as well. For flat foods like pizza, a bird’s eye view works best, while for layer-rich foods like burgers, a side angle can better display the ingredients.
- Experiment on multiple angles to find the most flattering side of the dish.
- Test out 45-degree angle, this often results in an inviting feel to the dish.
3. Food styling:
Food styling is a huge part of food photography and investing time in arranging food to look its best can significantly elevate the final image. This can often include placing stray ingredients around the main dish, using garnishing, or even using utensils and dishware as added elements.
- Garnishing the dish with herbs, spices, or even a drizzle of sauce can make it more true to life and appealing.
- Consider using props that fit the theme or enhance the color of the dish.
- Remember, less can often be more. Overcrowding the shot can detract from the main dish.
4. Managing colors:
A well-arranged color palette can visually unify a food image, creating an appealing composition. The colors of the food, the dish ware, and even the background all contribute to a harmonious whole.
- Consider using complementary colors or sticking to a specific color scheme for a more satisfying visual appeal.
- Experiment with tone-on-tone styling. This involves using props and backgrounds in the similar color family as the food.
Mastering composition in food photography is an art and requires practice. However, focusing on these elements will offer you a great start. Stay flexible, be creative and remember: there are no hard and fast rules. Instead, consider these guidelines a launching pad to your own unique food photography style.
Mastering the Use of Lights and Shadows: Essential Lighting Techniques in Food Photography
Lighting is the cornerstone of any type of photography, but for food photography, it can make or break your shots. With the right use of lights and shadows, you can highlight the texture, colours, and details of the food, making it seem more vibrant and appetizing. The goal is to create a balance between the brightness and darkness in your image to showcase food in the most appealing way.
Here are some key strategies and techniques for you to master:
1. Natural Lighting
One of the most recommended techniques by professional food photographers is to use natural light. Natural light provides a soft and diffused look that beautifully accentuates the textures and colors of food items. It’s often the best option for a beginner as it does not require any professional equipment. Windows, outdoor settings, or anywhere with a good source of natural light can work wonders.
2. Artificial Lighting
There will be times when you can’t rely on natural light, like during night-time shoots or in indoor locations with poor lighting. In these scenarios, artificial light is our best bet. LED lights, soft boxes, and ring lights are some of the commonly used artificial light sources. They help in creating a controlled environment and can be adjusted based on the mood of the photograph. Keep in mind, artificial lighting requires more technical understanding and might need some practice to get perfect.
3. Use of Reflectors and Diffusers
To create an even light distribution on your subject, the use of reflectors and diffusers can be extremely beneficial. Reflectors help in bouncing off the light to the shadowed parts of the food, ensuring a balanced photo, whereas diffusers soften the harsh light and prevents overexposure. While professionals use specialized gear for this, a simple white card or a piece of cloth can be a good start for beginners.
4. Understanding the direction of light
The direction from which the light hits your subject has a tremendous impact on the final output. Side lighting is a popular choice in food photography as it produces nice, long shadows that add depth to your shots. Front lighting, although can make your image look flat, it’s perfect for shooting flat lays as it evenly lights up the entire scene. Back lighting brings a beautiful backlight effect, which can be perfect for an artistic touch.
5. Shadows
Shadows play a vital role by adding depth and dimension to the images. The use of shadows depends on the style you wish to achieve. Hard shadows can give a strong, moody aesthetic, whereas soft shadows provide a more delicate and welcoming feel. Proper positioning and experimentation with your food, light source and camera angle can help you achieve the desired shadows.
Understanding and mastering these techniques will help you significantly in your food photography journey. It’s all about experimenting and improvising till you get the desired effect. The most crucial point to remember is that the food should remain the hero of your shot, and everything else, including lighting, should only work to enhance its allure.
Enhancing Food Photography with Professional Edit Techniques
The art of food photography is certainly not confined to capturing the right composition in well-thought-out lighting scenarios only. Post-production plays an equally crucial role in enhancing the appeal of your shots. Integrating professional-level editing techniques can boost visual interest and elevate your craft to the next level.
1. Color Balancing
Color plays a pivotal role in creating appeal and enhancing the visual interest in food photography. Balancing the colors in your photos can dramatically affect the perceptions of freshness and appeal of the food. Typically, warmer tones work well with food as they make it appear appetizing. Take advantage of software like Adobe Lightroom that allows tweaking the color balance effortlessly.
- Pay special attention to white balance to keep the colors in your photos accurate.
- Consciously use the saturation slider to enhance colors without overdoing it.
- Use the vibrance tool to boost less saturated colors and leave saturated colors alone. This subtly enhances the overall photo composition.
2. Sharpness and Clarity Enhancement
The goal of food photography is to make the food look deliciously irresistible. This is where sharpness and clarity play vital roles.
- Use the sharpness tool sparingly. Too much sharpness can make the image lose its natural appeal.
- Use the clarity slider for boosting midtone contrast in your image. It reveals more detail without causing any harshness.
3. Understanding Layer Masks and Adjustment Layers
Layer Masks and Adjustment Layers are powerful tools in Photoshop that allow selective adjustments to your image, without permanently affecting the original photo.
- Use adjustment layers to edit color balance, brightness, contrast, and saturation of individual sections of your photo.
- Employ layer masks to hide or reveal parts of the image or layer adjustments, providing greater control over the editing process.
4. Utilizing Healing and Cloning Tools
There are often imperfections in the food or the surrounding area that aren’t apparent until after the photoshoot. This is where the healing and cloning tools come in handy for cleanup.
- Use the spot healing brush tool, healing brush tool, patch tool or clone stamp tool to eliminate imperfections like crumbs, blemishes, or unwanted elements.
Remember, the key to successful food photography editing is subtlety. It’s about enhancing the attractive qualities of the food and minimizing any distractions. A restrained and tasteful application of these professional editing techniques can greatly uplift your food photography game, leading to a powerful visual narrative that is both tantalizing and aesthetically pleasing.
From Hobby to Profession: Incorporating Food Photography into Your Portfolio
There’s a certain appeal to capturing the essence of a delicious dish that can entice viewers to explore more. And this fascination, which starts as a hobby, can indeed become an exciting profession. Here, we will disclose how to elevate your passion for food photography and incorporate it into your professional portfolio successfully, making your creative journey both fulfilling and profitable.
1. Identifying Your Unique Style
Just like chefs, every photographer has a unique style. This distinct style of yours will set you apart in this canvass of food photography. From the positioning of your camera to the placement of the cutlery on the table, your perspective is unique and inimitable. Embrace your flair.
2. Building a Strong Portfolio
A strong and diverse portfolio is a testament to your talent and hard work. It showcases your work to potential clients and acts as a persuasive visual resume. Include various types of food and different styles of shooting. Remember, quality over quantity is key in curating your portfolio.
3. Studying and Emulating the Best
To improve your craft, follow and learn from those who excel in this field. Study books on food photography, follow top food blogs, and look at the best shot food photos in magazines and restaurants. Try to understand why these photos work and how to replicate their successes.
4. Photographing for a Purpose
Whether it’s for a restaurant menu, a food blog or for selling a product, your photos should convey a clear message. This way, your pictures are not just aesthetic but also useful and purposeful.
5. Professionalism is Vital
Once you decide to make the move from hobbyist to professional, it’s crucial to work on your professionalism. Be ready on time, meet your commitments, and respect the needs and preferences of your clients. This is as important as your technical skills
6. Keep Learning and Growing
As in any other artistic field, there will always be new techniques and styles that emerge in food photography. To keep up with the competition, you must be willing to learn and adapt to these changes regularly and upgrade your skills accordingly.
In conclusion, turning your hobby of food photography into a profession requires hard work, consistency, and a strong commitment to expanding your skills. The journey may seem daunting at first, but with the right mindset and guidance, it is remarkably rewarding. Remember, in the quest to perfection, perseverance and love for your work matter the most. So, keep your focus and take the plunge into the world of professional food photography.